
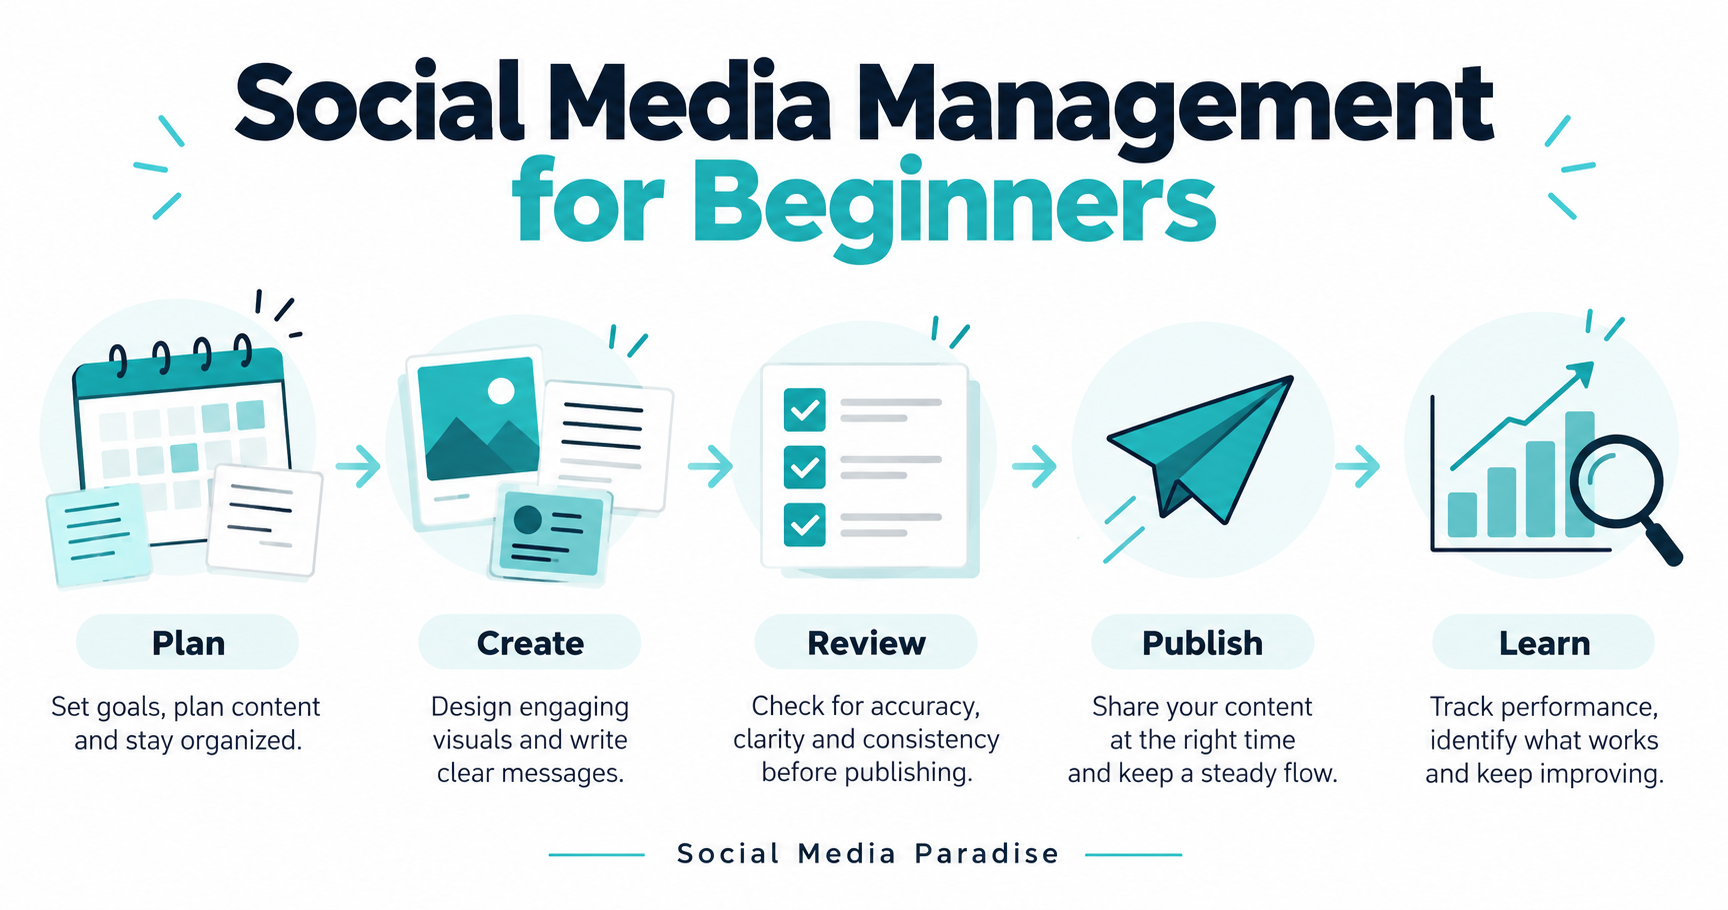
Social media management starts with a repeatable publishing process. You choose an audience, decide which questions deserve attention, prepare useful material and check the results. A scheduling tool supports those decisions. Buying software before defining the work often leaves a business with an empty calendar and another subscription.
Start with one audience and a publishing pace your team supports. Build a clear path from an idea to a reviewed post. Give someone responsibility for replies and corrections. Once those basics work, compare tools against your actual requirements instead of a long feature list.
This beginner guide explains the process without recommending a particular vendor. The examples are hypothetical planning exercises, not reported customer results or software tests. See our editorial standards for how Social Media Paradise approaches future reviews and comparisons.
In this guide
- Define the job before choosing software
- Audit your existing accounts and material
- Build a small set of content pillars
- Create an editorial calendar with clear ownership
- Prepare posts for the actual channel
- Include accessibility and disclosure checks
- Establish a review and approval process
- Test a scheduling tool with a real workflow
- Protect account access and connected applications
- Verify publication and handle replies
- Review results without inventing conclusions
- Work through a hypothetical first week
- Questions beginners ask
- Your next practical step
Define the job before choosing software
Write down why the business maintains a social presence. A local service company might explain common customer questions and demonstrate completed work. A software company might publish short tutorials and explain product changes. An independent publication might share original articles and invite readers into a relevant discussion.
Pick one primary outcome for the next planning period. Examples include qualified visits to a specific guide, useful product questions or attendance at an event. Avoid treating follower count as the entire objective. A larger audience offers little direction when nobody knows which action serves the business.
Describe the reader in ordinary language. Include the problem, level of familiarity and context in which the person sees your post. Someone reading on a phone between appointments needs a different explanation from a specialist assessing a detailed workflow. This description helps the writer choose examples, language and format.
Next, define what the team will maintain. List the selected channels, expected post formats, reply responsibilities and available production hours. Remove channels nobody owns. A deliberate choice to maintain one channel consistently gives you a more useful starting point than several abandoned profiles.
Audit your existing accounts and material
Create a simple inventory before adding another tool. Record each account name, profile URL, business owner, recovery contact and people with access. Keep passwords and recovery codes in an appropriate secure system, never inside an editorial calendar or public planning document.
Review profile names, descriptions, links and visual assets for consistency. Open the destination links on mobile. Confirm the business still offers the service described in each profile. Update outdated contact details through your normal approval process. Preserve account history and existing useful posts rather than deleting material without a reason.
Gather the content assets you already own. Include original articles, approved photographs, demonstrations, customer questions and product documentation. Record permissions and restrictions beside each asset. A photo available inside a shared folder does not establish permission to publish someone’s likeness or reuse a photographer’s work.
Use this inventory to identify gaps. Perhaps the business has plenty of product images but no clear explanation of setup. Perhaps short videos exist, but captions and transcripts are missing. Assign the next production effort to a real gap instead of making another variation of an asset already covered.
Build a small set of content pillars
A content pillar is a recurring subject relevant to your audience and business. Choose a few subjects broad enough to support multiple useful posts. For a hypothetical scheduling software business, those subjects might include appointment preparation, booking rules, team handoffs and troubleshooting.
Give each pillar a written scope. Explain which questions belong inside the subject and which belong elsewhere. This prevents every idea from becoming a separate category. Keep product announcements distinct from instructional content so the calendar does not become a series of sales messages with different headings.
Develop ideas from specific questions. Replace “post about productivity” with “explain who checks an appointment after a customer changes the time.” The second idea gives the writer a clear task and a practical example. Save the source of the question, such as an approved support summary or a publicly available discussion.
Link social posts to useful owned resources when a longer explanation is necessary. The destination should fulfill the promise made in the post. Avoid sending every reader to a generic homepage. Keep an idea backlog separate from the committed publishing calendar so unreviewed suggestions do not appear ready for release.
Create an editorial calendar with clear ownership
Your calendar needs enough detail to move work forward. Include the intended channel, topic, audience, format, owner, reviewer and target publication time. Add the draft, approved assets and destination URL. Use distinct statuses such as Idea, Draft, Review, Approved, Scheduled and Published.
Each status should describe a real condition. Approved means the designated reviewer checked the exact version scheduled for publication. Published means someone checked the live result. Avoid using Scheduled as a substitute for verifying delivery. A disconnected account or a rejected media file still requires attention.
Set a review deadline before the publication deadline. Leave time for corrections, especially when a post contains prices, event details, product claims or a paid relationship. Give reviewers a focused checklist so approval does not depend on a vague instruction to check everything.
Keep a change record for important revisions. A brief note explaining why a scheduled post changed helps the next person understand the decision. Do not fill every cell with routine notes. Record details requiring action, such as an expired asset permission, a pending claim check or a revised event time.
Prepare posts for the actual channel
Write the central point before formatting the post. Explain the reader’s problem, provide useful information and identify the next relevant action. Then adapt the message to the channel’s presentation rather than copying one unchanged draft across every profile.
Check how the channel handles links, images, video, captions and previews. Requirements change, so verify current platform documentation before promising a particular format or publishing method. A feature available through a native app does not prove a third-party scheduler supports the same workflow.
Create approved versions for the intended placements. A wide image used in an article often needs a separate composition for a vertical social post. Keep important text away from edges and interface overlays. Read the preview on a phone instead of assessing only the full-size design file.
Store the original source file and the approved export together with clear names. Record which version belongs to each channel. This reduces accidental publication of an earlier draft. Do not make a last-minute image replacement without repeating the relevant accuracy, accessibility and rights checks.
Include accessibility and disclosure checks
Accessibility belongs in production and review. Add meaningful alternative text where the platform supports the field. The W3C images tutorial explains how text alternatives depend on an image’s purpose. Describe the information a reader needs rather than filling the field with promotional keywords.
For a hypothetical chart showing three stages in an approval process, provide the stages in nearby readable text. A description such as “colorful chart” does not communicate the sequence. Check contrast and text size in the actual published format. Review captions for names, technical terms and accuracy instead of accepting an automated transcript unchanged.
Paid relationships need deliberate handling. The FTC’s social media disclosure guidance explains disclosure of material connections and placement alongside the endorsement. Build a disclosure field into relevant briefs. Do not assume a profile biography or a distant legal page provides enough context for every post.
Our affiliate disclosure explains this publication’s approach to commercial relationships. Before running a campaign, have the appropriate reviewer check the exact claims, relationship and audience. This guide describes an operational process, not a substitute for advice on a specific legal situation.
Establish a review and approval process
Give every post one accountable owner. Other people contribute information, but the owner moves the draft through review and resolves outstanding comments. Select a reviewer with authority over the information being published. A designer checking layout does not automatically verify a product performance claim.
Use a short checklist covering factual accuracy, destination links, dates, spelling, permissions, accessibility and required disclosures. Check the actual creative asset beside the final caption. A correct document paired with the wrong image creates a different message from the version someone approved.
Decide what happens when approval arrives late. Hold the post, move the slot or use a previously approved alternative. Do not turn silence into permission unless your organization has a documented process authorizing such a decision. Keep the final approved version accessible to the person scheduling publication.
Define an escalation path for sensitive material. Customer disputes, personal information, security incidents and unverified allegations deserve review outside an ordinary content queue. A publishing calendar should identify the responsible person without copying confidential case details into a shared marketing workspace.
Test a scheduling tool with a real workflow
Compare tools after documenting your requirements. Start with required account types, formats, review steps and reporting needs. Separate necessary functions from conveniences. Request a demonstration of the exact path your team follows, including the awkward parts such as revisions and failed publication.
Use a small, authorized test involving non-sensitive material. Prepare a draft, send the draft through review, schedule the approved version and inspect the live post. Check whether image descriptions, captions, links and account selection survive the process. Record failures with enough detail to reproduce them.
| Requirement | Practical test | Evidence to record |
|---|---|---|
| Account support | Connect the intended business account through the approved flow | Exact account type and supported publishing method |
| Approval | Return a draft for revision and approve the corrected version | Reviewer identity and approved version |
| Scheduling | Schedule a harmless test at a known time | Selected time zone and actual published time |
| Accessibility | Publish approved media with the available accessibility fields | Live text alternative or caption behavior |
| Failure handling | Review a documented failure example or supported test | Notification recipient and recovery steps |
| Export | Export an allowed sample of calendar and reporting data | Usable fields and file format |
Evaluate the time needed to maintain the tool, not only subscription price. Include onboarding, permissions, asset preparation and report checking. Do not buy a larger plan to solve a workflow problem the team has not defined. Document the decision and a date for reviewing whether the chosen setup still fits.
Protect account access and connected applications
Assign access through individual accounts and the platform’s supported roles where available. Avoid sharing a single login across contractors. Give people the access their work requires and remove access through the normal process when the relationship ends. Keep a current owner responsible for recovery and connected applications.
Use multifactor authentication where supported. CISA’s MFA tip sheet describes adding another identity check beyond the password. Store recovery material through your approved security process. An editorial spreadsheet is the wrong place for authentication secrets.
Before connecting a scheduler, read the requested permissions and confirm the application’s identity. Record which business accounts are connected and who authorized the connection. A contractor leaving the team does not necessarily remove a separate application’s access. Review both people and integrations.
Create a recovery checklist before trouble occurs. Identify who contacts the platform, who pauses queued material and who communicates with the business owner. Do not post screenshots containing recovery codes, personal messages or private account information when asking for help.
Verify publication and handle replies
Someone should check the live result after publication. Confirm the correct profile, complete caption, destination link, image crop and any disclosure. Record the live URL in the calendar. A green status inside the scheduler confirms only the state reported by the tool, not every detail visitors see.
Set responsibility for comments and direct messages. Distinguish ordinary questions from support requests requiring a private channel. Never request passwords, payment details or private account records in a public comment. Move the conversation through an approved support process when personal information becomes necessary.
Write response guidance rather than a script for every possible situation. Identify which questions receive a factual answer, which require research and which need escalation. Give the person monitoring replies access to current, approved information. Avoid making service commitments outside the person’s authority.
Plan for corrections. If a post contains an error, decide whether editing, removing or publishing a correction serves readers best. Record the decision and notify the responsible owner. Check any queued variations using the same incorrect detail so the error does not appear again next week.
Review results without inventing conclusions
Start reporting with the objective established at the beginning. Use a consistent reporting period and record the source of each number. Distinguish platform-reported reach, engagement, link clicks and activity on your own website. Different systems measure different events, so avoid presenting every number as a direct comparison.
Calculate rates with a stated denominator. For example, a hypothetical post with 12 link clicks and 600 recorded impressions has a click-to-impression ratio of 2 percent. This arithmetic alone does not explain why people clicked or whether the visits produced useful business outcomes.
Record context alongside results. Changes in topic, format, distribution, audience or promotion affect interpretation. A single strong post does not establish a reliable publishing rule. Use repeated observations to choose a focused next experiment, such as clarifying a confusing introduction or improving the destination resource.
Do not add new tracking systems during a content process review without the required authorization. Work with the data already available and describe the limits. Preserve reports and definitions so a future reviewer understands what was measured. Avoid promising sales or rankings from engagement numbers alone.
Work through a hypothetical first week
Consider a small business with one writer and one reviewer. The team selects one audience question and two related follow-up questions. Monday’s work produces a short explanation, a supporting image and a link to a useful owned guide. The calendar records the audience, owner and reviewer before anyone schedules publication.
On Tuesday, the reviewer checks claims and asks for a clearer example. The writer revises the caption, updates the approved asset and records the final version. Wednesday’s task is scheduling the post at the agreed time and checking the time zone. Publication is followed by a live inspection and reply monitoring.
The second post answers a different part of the same problem rather than repeating the first caption. The team records questions received and any broken steps in the process. At the end of the week, they review the time spent preparing, approving and maintaining the posts alongside the available results.
This example is a workflow exercise, not evidence of a successful campaign. Adjust the pace to available people and review requirements. The goal of the first week is a process the team understands, with useful material reaching the intended profile and a clear owner for what happens afterward.
Questions beginners ask
How many channels should a small team maintain?
Start with the channels your audience uses and your team has time to maintain. One well-owned channel gives you a workable process to assess. Add another when the extra production, review and reply work has a clear owner. Avoid treating account creation as a complete channel strategy.
Do I need paid scheduling software immediately?
A simple calendar and native publishing controls are enough to define the work. Paid software becomes relevant when a documented requirement, such as multi-person approvals or managing several profiles, exceeds the current process. Compare exact workflow support before selecting a plan.
Should every post include a sales link?
Choose the next action according to the reader’s need and the purpose of the post. Some explanations need an owned guide, while a short answer stands on its own. Keep promotional claims accurate and disclose relevant commercial relationships. Repeating a sales destination does not replace useful information.
What should I prepare before delegating publishing?
Provide the audience definition, calendar, brand assets, review checklist and escalation contacts. Use approved individual access. Explain who approves the final version and who checks the live result. Run a small supervised publishing exercise before handing over a large queue.
Your next practical step
Create the account inventory and one week of specific ideas before comparing software. Assign an owner and reviewer, prepare one useful post and test the complete path through publication. Record the live result and the changes needed for the next cycle.
Read more in our Blog, review how this publication works or contact Social Media Paradise with a question for a future guide. Preserve a process your team understands as the calendar grows. More scheduled posts do not remove the need for accurate information, clear ownership and reader-focused explanations.

Trevor Fenner publishes practical guides to software, online business and digital workflows. Social Media Paradise explains social media tools, publishing processes and clear editorial decisions.